Step-by-Step Guide to Bridging to Loopring with Orbiter Finance for High-Throughput and Low-Cost Transactions
Welcome to the future of decentralized finance!
Are you tired of slow and expensive transactions on the Ethereum network? Your solution is here! With Orbiter Finance’s innovative bridging technology, you can now enjoy high throughput and low cost transactions on Loopring, one of the most powerful decentralized exchanges in the market.
But what exactly is bridging?
Bridging refers to the process of connecting two blockchain networks, allowing seamless transfer of assets between them. With Orbiter Finance, you can bridge your Ethereum assets to Loopring’s Layer 2 solution, which is built on top of Ethereum, combining the security of the Ethereum network with the scalability of Layer 2 technology.
How does it work?
First, you need to connect your Ethereum wallet to the Orbiter Finance interface. Once connected, you can choose the assets you want to bridge to Loopring. Whether it’s ETH, ERC-20 tokens, or even NFTs, Orbiter Finance supports a wide range of assets.
After selecting your assets, Orbiter Finance will guide you through the bridging process, providing step-by-step instructions to ensure a smooth and secure transfer. You’ll be able to track the progress of your bridge transaction in real-time, giving you peace of mind.
Why choose Orbiter Finance?
Orbiter Finance is dedicated to providing you with the best bridging experience possible. With our cutting-edge technology, you can enjoy lightning-fast transactions and minimal fees, significantly improving your overall DeFi experience.
So why wait? Start bridging to Loopring with Orbiter Finance today and unlock the full potential of decentralized finance!
Understanding Loopring and Orbiter Finance
Loopring is a decentralized exchange (DEX) protocol built on Ethereum that aims to provide scalable and secure trading solutions. It allows users to trade digital assets directly from their wallets without the need to deposit funds on an exchange. By utilizing zkRollups, Loopring is able to achieve high throughput and low-cost transactions without compromising on security.
Orbiter Finance is a layer 2 aggregator built on top of the Loopring protocol. It aims to provide a seamless and user-friendly experience for traders by aggregating liquidity from various DEXs. With Orbiter Finance, users can enjoy the benefits of trading on Loopring while accessing a wide range of trading pairs and pools.
By bridging to Loopring with Orbiter Finance, users can take advantage of the high throughput and low-cost transactions offered by the Loopring protocol. They can trade assets with minimal slippage and enjoy lower fees compared to other decentralized exchanges. The bridge allows users to transfer their assets from Ethereum to Loopring and vice versa, enabling them to participate in the growing DeFi ecosystem.
In addition, by using the Orbiter Finance bridge, users can tap into a larger liquidity pool, access additional trading pairs, and benefit from enhanced trading opportunities. The bridge is designed to be secure and user-friendly, ensuring a seamless experience for users.
Overall, understanding Loopring and Orbiter Finance is essential for anyone looking to leverage the benefits of decentralized exchange and participate in the rapidly growing DeFi space. By bridging to Loopring with Orbiter Finance, users can enjoy high throughput, low-cost transactions, and access a wide range of trading pairs to maximize their trading opportunities.
The Need for High Throughput and Low Cost Transactions
In today’s fast-paced digital world, speed and efficiency are key factors for success. Whether it’s a financial transaction, a data transfer, or any other form of communication, the ability to perform tasks quickly and cost-effectively is highly desirable.
The Importance of High Throughput
High throughput refers to the rate at which transactions or data can be processed within a given time frame. It is crucial for businesses and individuals who deal with a large volume of transactions or data on a regular basis. High throughput allows for more efficient operations, reducing the time it takes to complete tasks and increasing overall productivity.
For example, imagine a company that processes thousands of financial transactions per second. Without high throughput, this company would struggle to keep up with the demand, leading to delays and potentially lost business opportunities. With high throughput, on the other hand, the company can handle a large volume of transactions seamlessly, ensuring that everything is processed in a timely manner.
The Benefits of Low Cost Transactions

Low cost transactions are equally important for businesses and individuals alike. Minimizing transaction costs can significantly impact profitability and financial well-being. By reducing the fees associated with transactions, individuals can keep more of their hard-earned money, while businesses can improve their bottom line.
Additionally, low cost transactions can enable new business models and opportunities. For example, in the world of decentralized finance (DeFi), low cost transactions allow for micro-transactions and real-time settlement, making it possible to create innovative financial products and services that were previously not economically viable.
| High Throughput | Low Cost Transactions |
|---|---|
| Enables efficient operations | Minimizes transaction fees |
| Increases overall productivity | Improves profitability |
| Allows for scalability | Enables new business models |
In conclusion, the need for high throughput and low cost transactions cannot be underestimated. In a world where speed and efficiency are paramount, businesses and individuals must seek out solutions that offer these capabilities. By bridging to Loopring with Orbiter Finance, users can benefit from high throughput and low cost transactions, empowering them to succeed in today’s digital landscape.
Step 1: Setting Up a Wallet
To start bridging to Loopring using Orbiter Finance, you will need to set up a compatible wallet. Follow these simple steps to get started:
Step 1.1: Choose a Wallet
First, decide which wallet you would like to use for the bridging process. There are several options available, including MetaMask, Trust Wallet, and Ledger Live.
Step 1.2: Install the Wallet
Once you have selected a wallet, download and install it on your device. Visit the official website for the chosen wallet and follow the instructions provided.
Step 1.3: Create a New Wallet
After installation, open the wallet application and choose the option to create a new wallet. Make sure to write down and securely store your wallet’s seed phrase or recovery words. This will be essential for future access to your wallet.
Step 1.4: Fund Your Wallet
In order to perform bridging transactions on Orbiter Finance, you will need to have some funds in your wallet. Use a supported cryptocurrency exchange or another wallet to transfer the desired amount to your newly created wallet address.
Once you have completed these steps, your wallet will be ready to use for bridging to Loopring using Orbiter Finance. Proceed to the next step for detailed instructions on connecting your wallet to the Orbiter Finance platform.
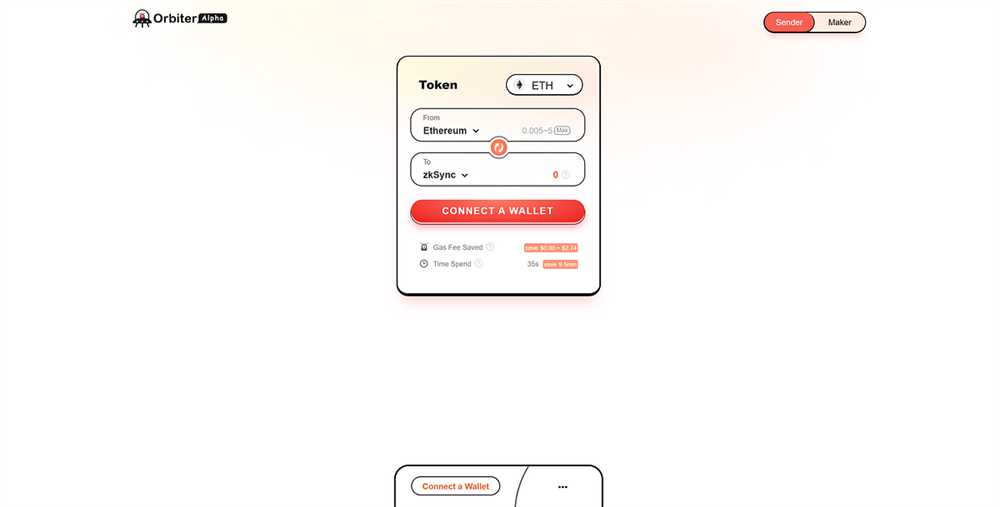
Choosing a Compatible Wallet
When bridging to Loopring with Orbiter Finance for high throughput and low cost transactions, it is important to choose a compatible wallet that supports the necessary functionalities. A compatible wallet will ensure smooth and seamless integration with the Orbiter Finance platform.
Considerations for Choosing a Wallet
When selecting a wallet, there are several factors to consider:
- Compatibility: Ensure that the wallet you choose is compatible with the Loopring protocol and supports the necessary features. This includes the ability to interact with smart contracts, approve transactions, and sign messages.
- Security: Security should be a top priority when choosing a wallet. Look for wallets that offer robust security measures such as multi-factor authentication, hardware wallet integration, and secure key storage.
- User Experience: A user-friendly interface and intuitive design can greatly enhance your experience when using a wallet. Look for wallets that offer a smooth and easy-to-navigate user interface, as well as additional features such as transaction history and portfolio tracking.
- Community Support: Consider the level of community support and developer activity surrounding a wallet. An active community and regular updates indicate that the wallet is well-maintained and supported.
- Platform Compatibility: Depending on your device and operating system, you will want to ensure that the wallet you choose is compatible. Check if the wallet is available for your preferred platform, such as iOS, Android, or web-based.
By considering these factors, you can choose a compatible wallet that meets your needs and provides a seamless bridging experience with Orbiter Finance and Loopring.
Creating a New Wallet

Creating a new wallet is the first step to start using Orbiter Finance for high throughput and low-cost transactions on Loopring. Follow the step-by-step guide below to create your new wallet:
Step 1: Visit the Orbiter Finance Website
Open your web browser and navigate to the Orbiter Finance website. You can do this by entering the URL https://www.orbiter.finance in the address bar.
Step 2: Click on “Create Wallet”
Once you are on the Orbiter Finance website, locate the “Create Wallet” button and click on it. This will take you to the wallet creation page.
Step 3: Set a Strong Password
On the wallet creation page, you will be prompted to set a password for your new wallet. Make sure to choose a strong, unique password that you can remember. It is important to keep this password secure as it will be needed to access your wallet in the future.
Step 4: Backup Your Wallet
After setting the password, you will be asked to back up your wallet. This usually involves saving a backup phrase or mnemonic that can be used to restore your wallet if needed. Follow the instructions provided on the screen to complete the backup process.
Step 5: Confirm Your Wallet
Once you have backed up your wallet, you will need to confirm your wallet creation. This may involve verifying your email or mobile number, depending on the verification process set by Orbiter Finance. Follow the instructions provided to complete the wallet confirmation.
Step 6: Start Using Your Wallet
Once your wallet creation and confirmation is complete, you are ready to start using your new wallet on Loopring with Orbiter Finance. You can now enjoy high throughput and low-cost transactions for various activities such as trading, staking, and more.
Remember to keep your wallet password and backup phrase safe and secure.
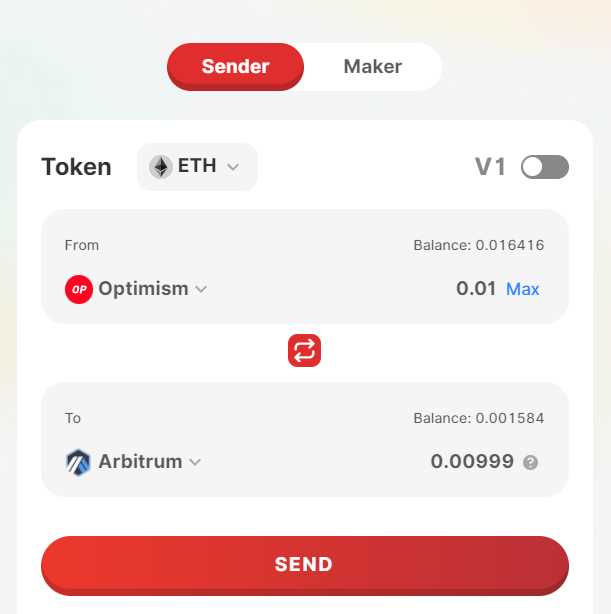
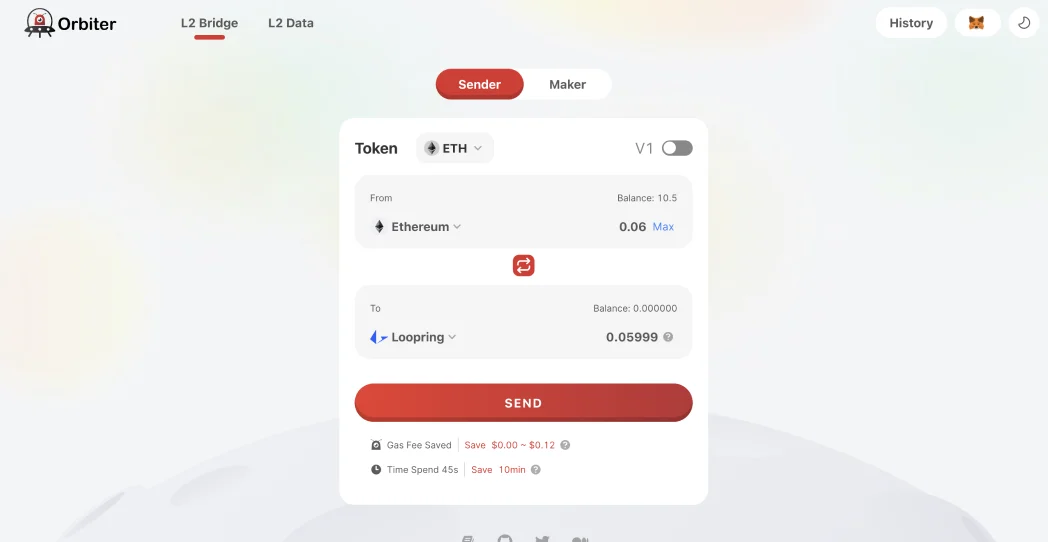
Step 2: Bridging to Loopring

Once you have familiarized yourself with Orbiter Finance and its benefits for high throughput and low cost transactions, it’s time to bridge your assets to Loopring, a decentralized exchange protocol.
Bridging your assets to Loopring allows you to take advantage of its advanced features and liquidity pools. Follow the steps below to successfully bridge your assets:
- Ensure that you have a supported wallet that is compatible with the Loopring protocol. Examples of compatible wallets include MetaMask and WalletConnect.
- Access the Orbiter Finance platform and navigate to the Bridge section.
- Select the assets you wish to bridge from your wallet to Loopring. Make sure to review the bridging fees associated with each asset.
- Generate a bridge transaction by entering the desired amount of assets to bridge and confirming the transaction details.
- Initiate the bridge transaction from your wallet by signing the transaction using your private key or wallet password.
- Once the bridge transaction is confirmed on the Orbiter Finance platform, your assets will be bridged to Loopring.
- Now you can access Loopring and start trading with your bridged assets. Take advantage of the high throughput and low cost transactions provided by Orbiter Finance.
By following these simple steps, you will be able to bridge your assets to Loopring and unlock the full potential of decentralized trading. Don’t miss out on the benefits of high throughput and low cost transactions – start bridging to Loopring with Orbiter Finance today!
Understanding the Bridge Process
When it comes to bridging to Loopring with Orbiter Finance, it’s important to understand the process involved. The bridge process allows for high throughput and low-cost transactions, making it the ideal choice for those looking to transfer assets quickly and efficiently.
Step 1: Initiating the Bridge
The first step in the bridge process is initiating it. This involves selecting the assets you wish to transfer and connecting your wallet to the Orbiter Finance platform. Once you’ve done this, you can proceed to the next step.
Step 2: Depositing the Assets
After initiating the bridge, the next step is depositing the assets. This involves transferring the selected assets from your wallet to the Orbiter Finance platform. The platform will then lock these assets securely to ensure their safety during the bridge process.
Step 3: Confirming the Deposit
Once you’ve deposited the assets, it’s important to confirm the deposit. This step ensures that the assets are locked and ready to be bridged to Loopring. The confirmation process may require you to sign a transaction or provide additional verification depending on the requirements set by Orbiter Finance.
Step 4: Bridging to Loopring
After confirming the deposit, the assets are ready to be bridged to Loopring. The bridge process takes the locked assets from Orbiter Finance and transfers them to Loopring, where they can be utilized for high throughput and low-cost transactions. This step is automated and typically completes within a few minutes.
Step 5: Utilizing the Bridged Assets
Once the assets have been successfully bridged to Loopring, you can start utilizing them for various purposes. Whether it’s trading, providing liquidity, or participating in decentralized finance (DeFi) applications, the bridged assets offer increased opportunities for users to maximize their investments.
By understanding the bridge process, users can take full advantage of the high throughput and low-cost transactions offered by Orbiter Finance’s integration with Loopring. Whether you’re a trader, investor, or DeFi enthusiast, bridging to Loopring opens up new possibilities and greater efficiency for your digital asset transfers.
Q&A:
What is Loopring?
Loopring is a layer 2 scaling solution for Ethereum that aims to increase the transaction throughput and reduce the cost of transactions. It helps to solve the scalability issues of Ethereum by implementing a decentralized exchange protocol.
How does Orbiter Finance bridge to Loopring?
Orbiter Finance provides a step-by-step guide that allows users to bridge their assets from Ethereum to Loopring. This guide includes instructions on how to set up a Loopring wallet, deposit assets to Loopring, and trade on Loopring’s decentralized exchange.
Why should I use Orbiter Finance’s guide to bridge to Loopring?
Orbiter Finance’s guide provides a seamless and user-friendly experience for bridging assets to Loopring. It ensures fast and low-cost transactions by leveraging Loopring’s layer 2 scaling solution. Additionally, Orbiter Finance provides support and assistance throughout the bridging process.
Video:
Activate a full (L1+L2) Loopring Smart Wallet – with funds from a Centralized Exchange [QUICK GUIDE]
Related Posts

Phishing Warning: Suspicious Activity Detected in Orbiter Finance Discord Channel
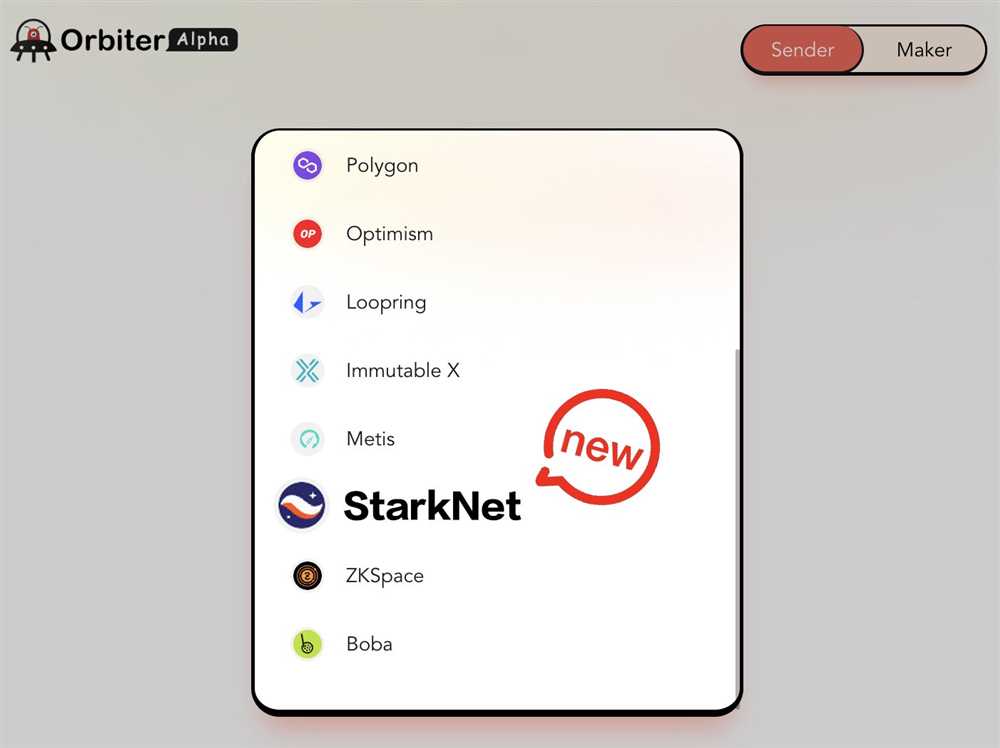
Orbiter Finance Revolutionizes Crypto Transactions with Seamless Integration to StarkNet and Other Networks