Step-by-Step Guide for Sending Funds to StarkNet with Orbiter Finance and Argent X Wallet
Welcome to the future of decentralized finance!
Orbiter Finance and Argent X Wallet are pleased to present a step-by-step guide on how to securely and efficiently send your funds to StarkNet, the revolutionary blockchain platform.
Are you ready to embark on this exciting journey? Follow the simple steps below:
Why choose Orbiter Finance and Argent X Wallet?
When it comes to securely sending funds to StarkNet, there are a few reasons why Orbiter Finance and Argent X Wallet stand out above the rest.
|
|
Orbiter Finance: Maximizing Security Orbiter Finance is dedicated to providing top-notch security for your transactions. With their advanced encryption technology, your funds are always protected from any potential threats. Their rigorous audit process ensures that all transactions are secure and reliable. |
|
|
Argent X Wallet: Unparalleled User Experience Argent X Wallet sets itself apart with its sleek and intuitive user interface. Sending funds to StarkNet has never been easier. With just a few simple steps, you can securely transfer your funds without any hassle. Their user-friendly design makes it accessible for users of all levels of expertise. |
By choosing Orbiter Finance and Argent X Wallet, you can have peace of mind knowing that your funds are safe and your user experience is seamless. Don’t settle for anything less when it comes to sending funds to StarkNet.
Step 1: Create an account
To begin sending funds to StarkNet with Orbiter Finance and Argent X Wallet, you will need to create an account. Follow the steps below to get started:
| 1. | Visit the Orbiter Finance website and click on the “Sign Up” button. |
| 2. | Fill out the registration form with your personal information, including your name, email address, and password. |
| 3. | Read and accept the terms and conditions of the service. |
| 4. | Verify your email address by clicking on the verification link sent to the email you provided. |
| 5. | Once your email is verified, you can log in to your Orbiter Finance account using your registered email and password. |
By creating an account, you will have access to the features and services offered by Orbiter Finance and be able to safely send funds to StarkNet using the Argent X Wallet.
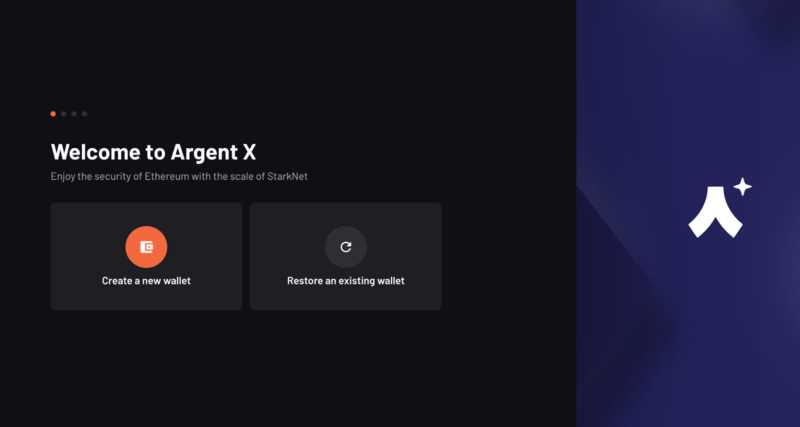
Step 2: Set up your wallet

Before you can start sending funds to StarkNet using Orbiter Finance and Argent X Wallet, you need to set up your wallet. Follow the steps below to get started:
1. Download the Argent X Wallet app

Visit the App Store or Google Play and download the Argent X Wallet app on your iOS or Android device. This secure wallet app will allow you to store, manage, and send your funds to StarkNet.
2. Create a new wallet
Open the Argent X Wallet app and follow the prompts to create a new wallet. Make sure to choose a strong password and enable any additional security measures, such as biometric authentication, to protect your funds.
3. Backup your wallet
Once you have created your wallet, it’s crucial to back it up. Follow the instructions provided by the Argent X Wallet app to securely backup your wallet. This will allow you to recover your funds in case you lose or replace your device.
4. Connect your wallet to Orbiter Finance
Now, open the Orbiter Finance app and go to the wallet settings. Choose “Connect a wallet” and select Argent X Wallet from the options. Follow the on-screen instructions to connect your wallet to Orbiter Finance.
5. Secure your wallet

Finally, take some additional steps to secure your wallet. Enable any additional security features provided by the Argent X Wallet app, such as multi-factor authentication or hardware wallet integration. Additionally, make sure to keep your wallet’s recovery phrase in a safe and offline location.
Congratulations! You have successfully set up your wallet and are now ready to send funds to StarkNet using Orbiter Finance and Argent X Wallet. Proceed to the next step to learn how to initiate a transaction.
Step 3: Verify your identity
As part of our commitment to security and compliance, verifying your identity is an essential step to ensure the safety of your funds. Follow the instructions below to complete the identity verification process:
- Open the Orbiter Finance app on your mobile device or desktop.
- Navigate to the “Verify Identity” section within the app.
- Provide the required personal information, including your full name, date of birth, and address.
- Upload a clear and valid photo of your government-issued identification document (e.g., passport or driver’s license).
- Take a selfie to confirm your identity.
- Review the information you have provided and submit the verification request.
- Wait for the verification process to be completed. This may take a few minutes.
- Once your identity is successfully verified, you will receive a notification.
Please note that all the information you provide during the identity verification process will be treated with the utmost confidentiality and used solely for verification purposes. Our dedicated team of experts ensures that your personal data is safeguarded at all times.
By verifying your identity, you will gain access to a wide range of features and benefits within the Orbiter Finance platform, including secure fund transfers to StarkNet and seamless integration with the Argent X Wallet.
Thank you for choosing Orbiter Finance and Argent X Wallet. We are committed to providing you with a secure and user-friendly experience.
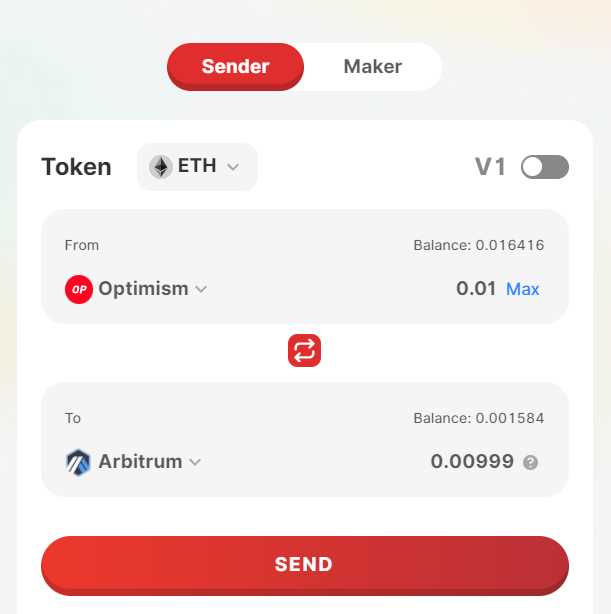
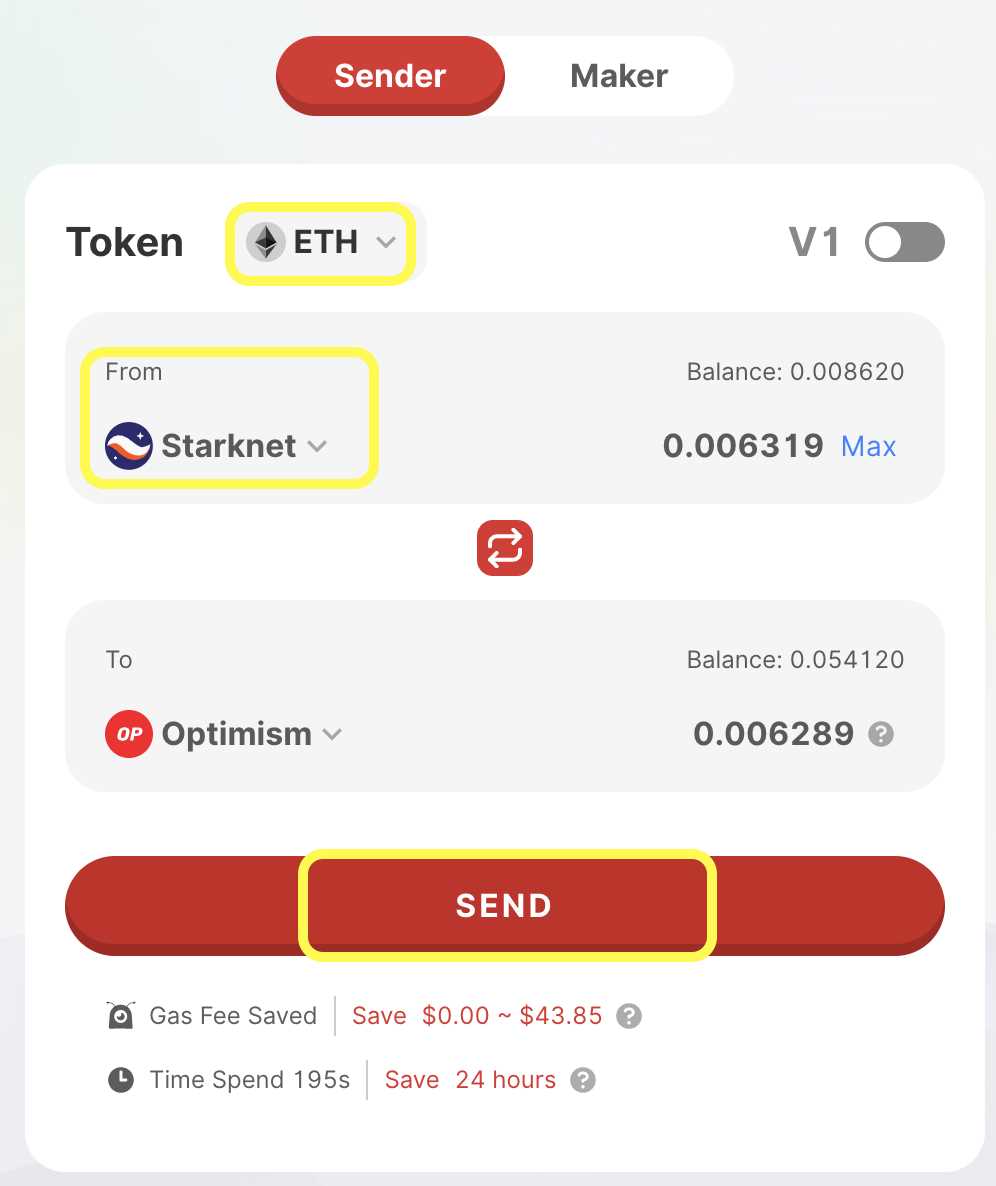
Step 4: Transfer funds
Once you have successfully connected your Orbiter Finance and Argent X Wallet accounts, you are ready to transfer funds to StarkNet. Follow these simple steps to complete the transfer:
| Step | Action |
| 1 | Open the Argent X Wallet application on your device. |
| 2 | Click on the “Transfer” button. |
| 3 | Select the desired amount of funds you want to transfer. |
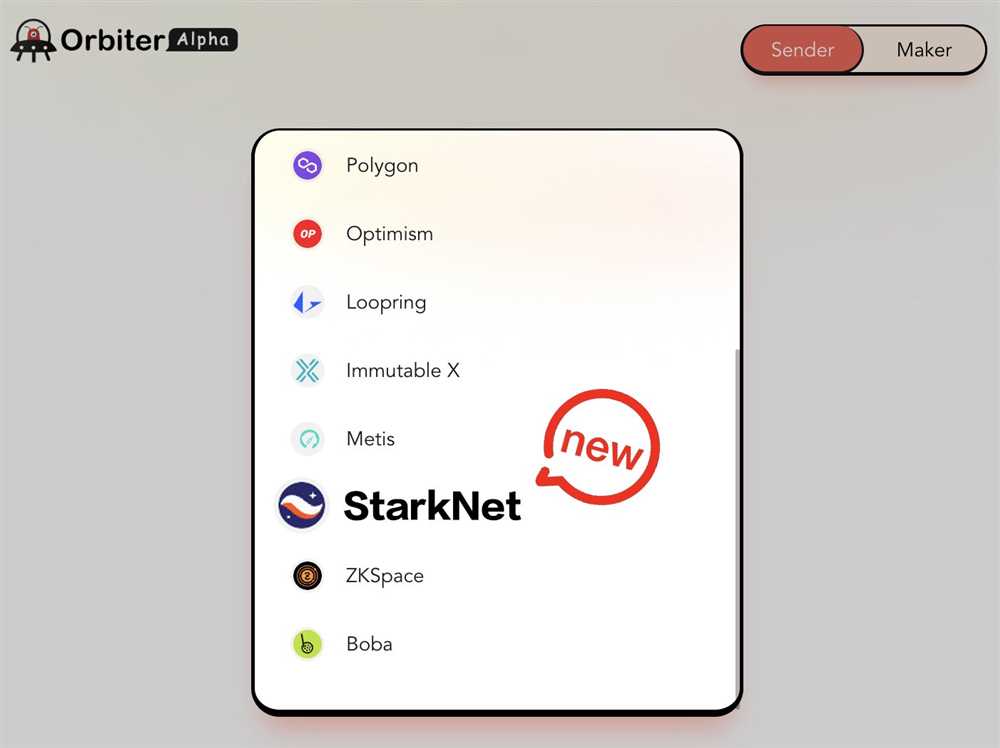
| 4 | Enter the recipient’s StarkNet address in the designated field. |
| 5 | Review the transaction details and click on the “Confirm” button. |
| 6 | Wait for the transaction to be processed and confirmed on the blockchain. |
| 7 | Once the transfer is complete, you will receive a confirmation notification. |
By following these steps, you can securely transfer your funds to StarkNet using Orbiter Finance and the Argent X Wallet. Start sending funds now and explore the limitless possibilities of decentralized finance on StarkNet!
Q&A:
What is StarkNet?
StarkNet is a Layer 2 scaling solution for Ethereum that aims to improve scalability and reduce gas fees.
What is Orbiter Finance?
Orbiter Finance is a platform that allows users to easily send funds to StarkNet without the need for complicated setups or technical knowledge.
What is Argent X Wallet?
Argent X Wallet is a cryptocurrency wallet that provides a user-friendly interface and built-in integration with Orbiter Finance, making it easy to send funds to StarkNet.
How can I send funds to StarkNet using Orbiter Finance and Argent X Wallet?
To send funds to StarkNet, you first need to install the Argent X Wallet on your device. Once installed, create a new account and follow the on-screen instructions to set up your wallet. Once your wallet is set up, you can connect it to Orbiter Finance and transfer funds to the StarkNet network.
Is it safe to send funds to StarkNet using Orbiter Finance and Argent X Wallet?
Yes, sending funds to StarkNet using Orbiter Finance and Argent X Wallet is safe. Both platforms follow strict security measures to protect your funds and ensure a secure transaction process.
Video:
How to Quality for the StarkNet Airdrop ($STRK Step-by-Step Guide) – Biggest Airdrops of 2023
Related Posts

Phishing Warning: Suspicious Activity Detected in Orbiter Finance Discord Channel
Orbiter Finance Revolutionizes Crypto Transactions with Seamless Integration to StarkNet and Other Networks